I’m a big believer in leveraging keyboard shortcuts when manipulating text. A big aha moment in my computer career was when I discovered the power of Vim. Once I got the essence of VIM I could navigate text without having to rely on my mouse or slow up/down page up/page down keys. Coding and text manipulation went from a disjointed slow context switch driven frustration (keyboard/mouse switching) to a fluent seamless experience where text entry/navigation was at the speed of thought.
As I’ve progressed, and as our industry has progressed, the need/desire to work in different operating systems and IDE’s has increased. While writing this I have two machines on my desk, a Mac and a Windows machine. On each machine I have multiple IDE’s - Visual Studio, Rider, Ruby Mine, VS Code, etc. Each IDE has it’s own default key sequence which makes it almost impossible to remember and leverage keyboard shortcuts. When working in one OS and IDE things were simple, as soon as you move to two or more environments things begin to get complicated and frustrating really quickly.
To make this even more challenging, add pairing or mobbing to the equation where you may be moving from machine to machine. The complexity of remembering what keyboard sequence you need for what machine, OS and IDE becomes unmanageable - soon you give up and revert back to using an incredibly slow mouse to navigate anything more than basic commands :-(
Taking a step back, what do I want? From a keyboard shortcut lens what I really want is the same keyboard shortcut to do the same thing regardless of IDE or OS or machine! While getting to that ideal is probably never going to happen (some fundamental OS concepts make this impossible), it is possible to get to a manageable state. Over the years I’ve tried different things and have eventually settled on an approach that I believe reduces the cognitive load significantly and brings it to a manageable state.
So how have I done this? The secret… getting the most you can from a hardware reprogrammable keyboard… let me explain how!
I own a Ultimate Hacking Keyboard also known as a UHK. My UHK has three key features that allows me to standardise my keyboard shortcuts across IDE’s, they are:
1) Keymaps
2) Layers
3) Macros
For each IDE/OS combination I have a separate keymap. That means I have a keymap for Rider on Mac, a keymap for Rider on Windows and so on.
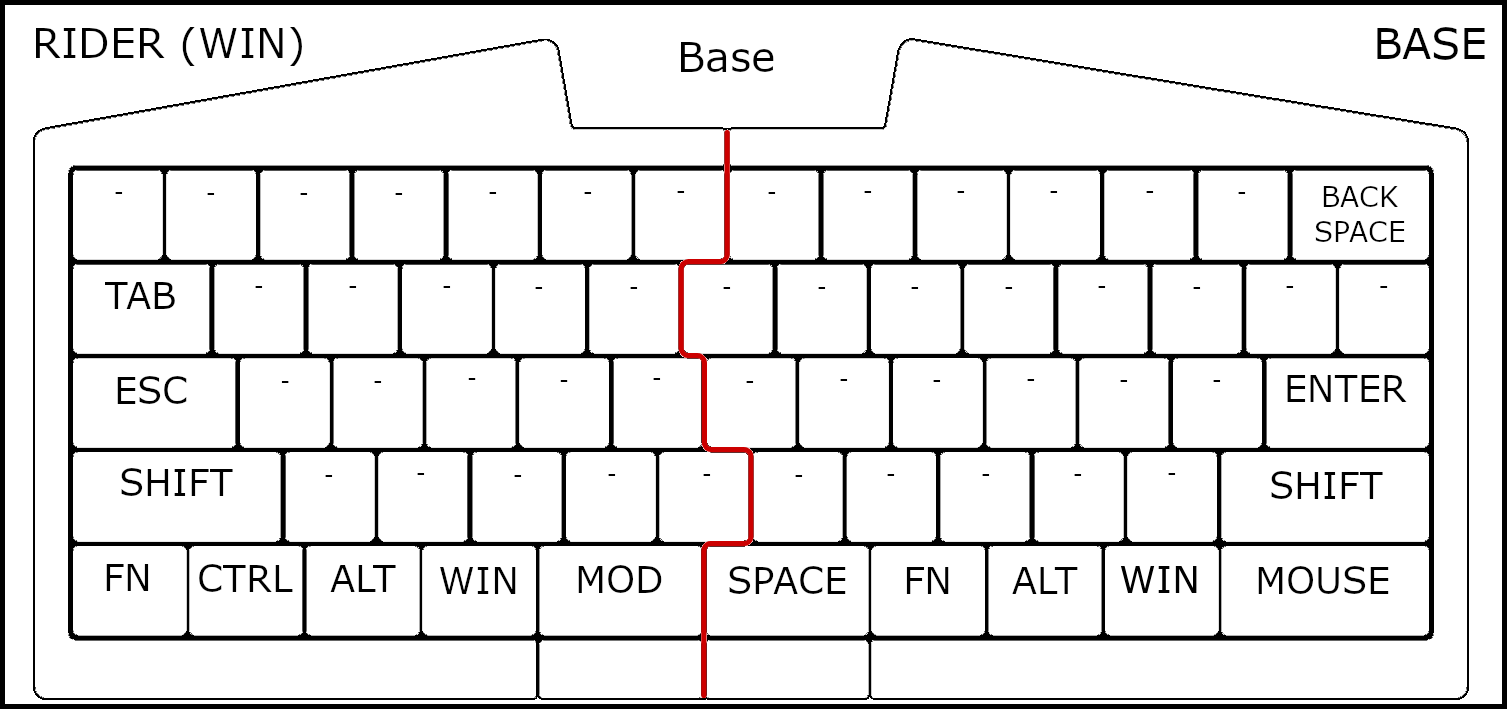
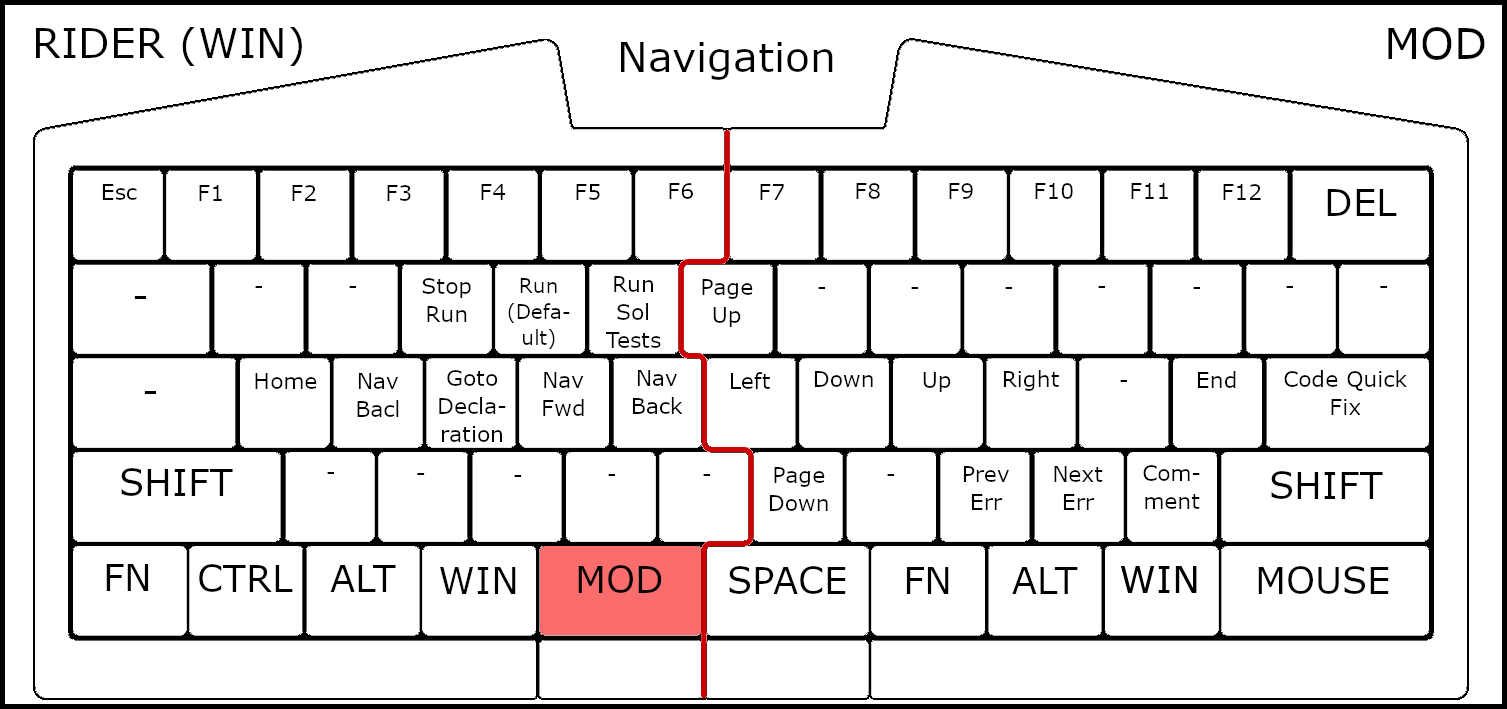
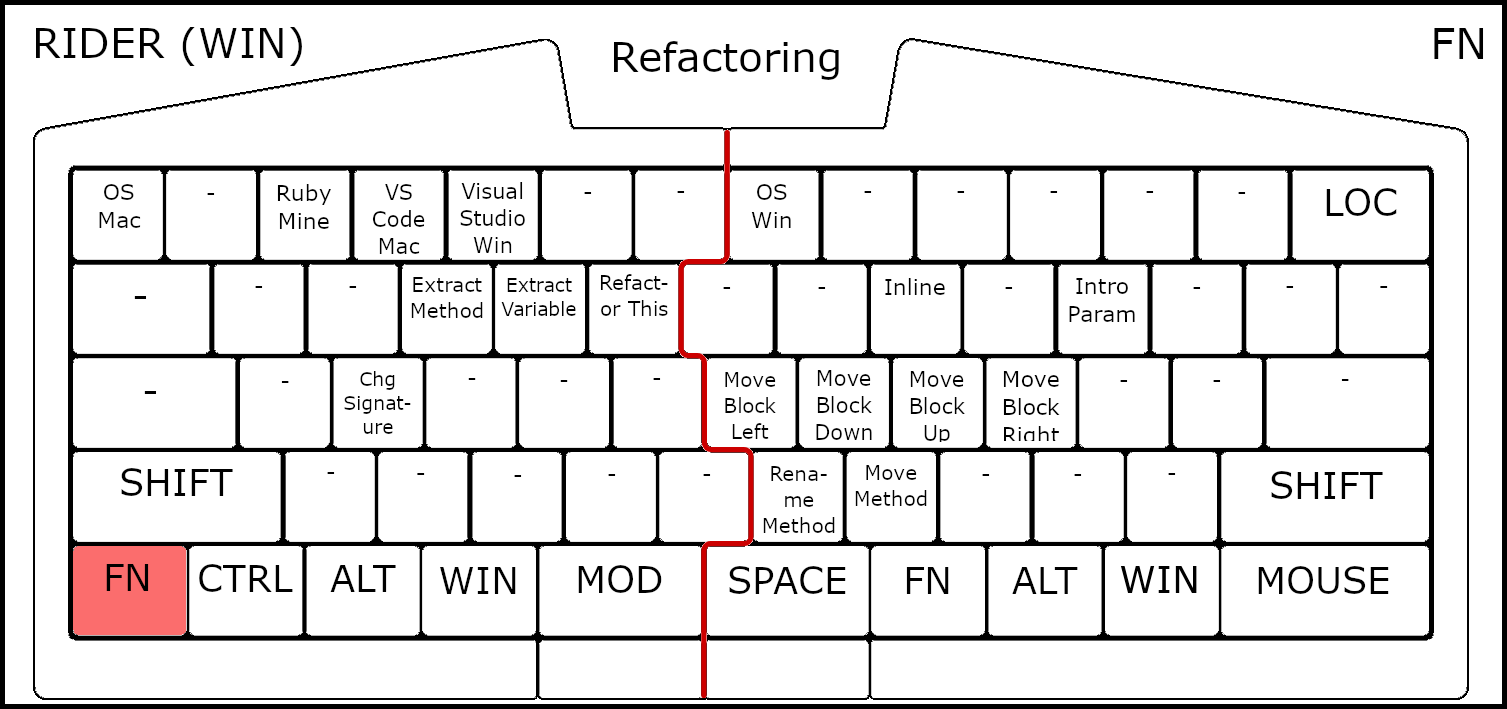
Each keymap has several layers: Base, Mod, Fn, Mouse. Don’t get put out by the names of these layers - you can use a layer for anything. For myself, I have three main groupings of shortcuts which correlate to a layer: Normal Keyboard (Base), Navigation (Mod), Refactoring (Fn) and Test/Debug (Mouse).
Each key on a layer can be assigned an action. There are a range of actions including:
- specific key press sequence
- layer change
- keymap change
- trigger a macro
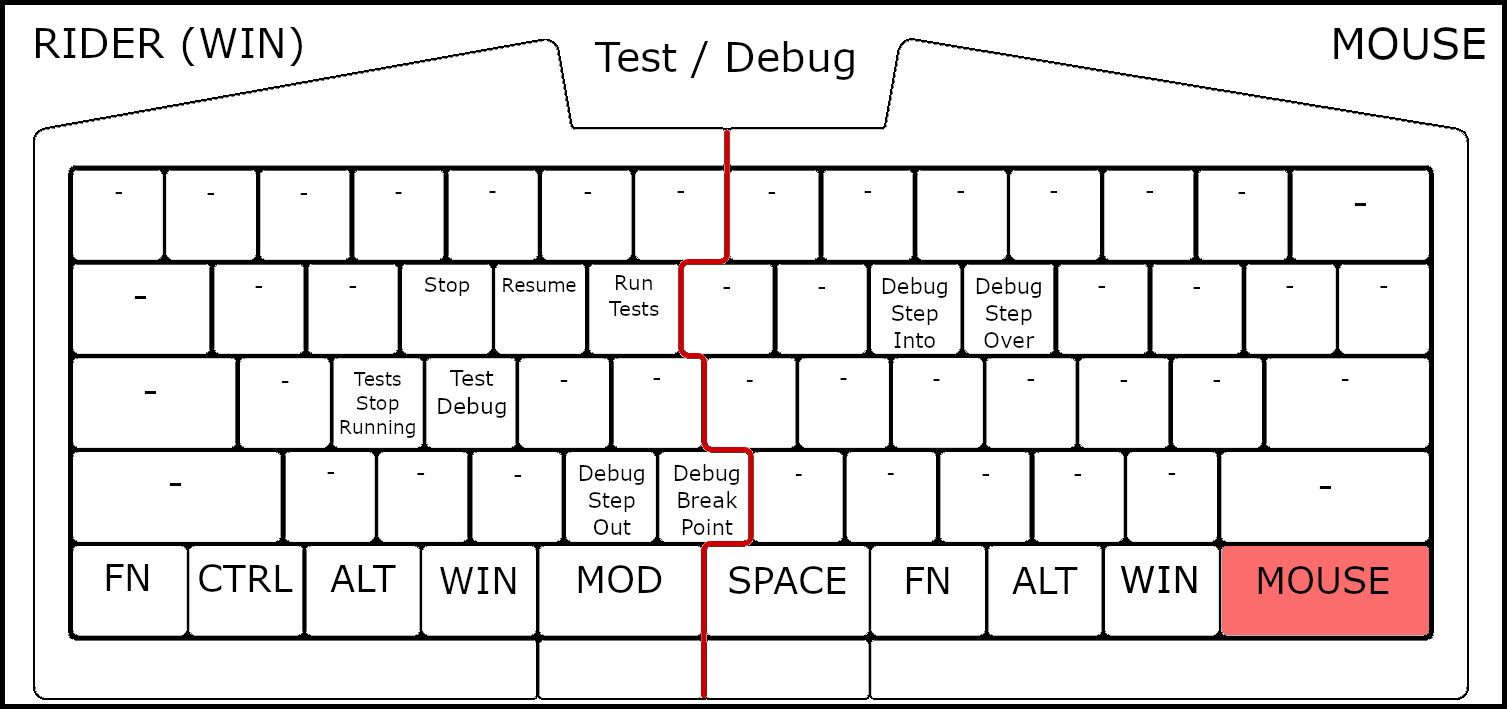
To standardise keys, I’ve created a macro for each behaviour I want to trigger in each IDE. Let’s look at the “Debug Step Over” behaviour.
In Visual Studio (Windows), the key sequence for this is F10. In Rider (Windows) it’s F8. In Rider (Mac) it is back to F10. On my UHK regardless of IDE I press the far bottom right key (Mouse) plus the key on the second row, 5 from the right (O key). The benefit of this is were I to go into a new IDE, all I have to do is make a new keymap, copy my existing macros and change the key sequence behind the macro - the actual key on my keyboard remains the same… reduced cognitive load!
To give you an idea of what a keymap looks like, I’ve put a copy of my current “Rider for Windows” keymap below: